Snowman Decoration Design Ideas
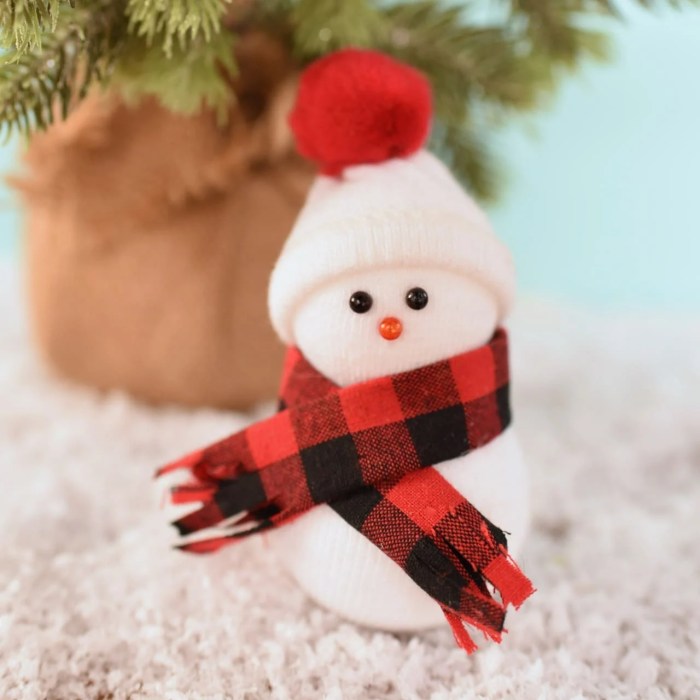
Diy christmas decorations snowman – Creating unique snowman decorations can add a touch of festive charm to your home this Christmas. From simple additions to more elaborate designs, the possibilities are endless. The level of complexity can be tailored to your skill level and available time, allowing for both quick crafts and more involved projects.
Below are five unique design concepts for DIY snowman decorations, showcasing a range of complexity and styles.
- Simple Pinecone Snowman: Glue three pinecones together, layering them from largest to smallest to form the snowman’s body. Add small twigs for arms, and use small berries or seeds for facial features. This is a quick and easy project, ideal for children.
- Upcycled Fabric Snowman: Use scraps of felt, old sweaters, or other fabrics to create a snowman. Sew or glue the pieces together, adding buttons for eyes and a carrot nose. This allows for creative use of existing materials.
- Beaded Snowman Ornament: String white beads onto wire or fishing line to create the snowman’s body. Add smaller beads or sequins for details such as eyes, buttons, and a hat. This is a delicate and elegant option, perfect for hanging on a tree.
- Mason Jar Snowman: Decorate a mason jar to resemble a snowman. Paint the jar white, and add facial features using paint pens or markers. Add a small scarf made from yarn or ribbon, and perhaps a tiny top hat made from felt. This is a versatile option that can be used as a container or standalone decoration.
- Elaborate Paper Mache Snowman: Create a larger, more detailed snowman using the paper mache technique. This involves layering strips of newspaper dipped in paste over a balloon or other form. Once dry, paint and decorate the snowman with various materials, allowing for intricate detailing and personalized design.
Elaborate Paper Mache Snowman Decoration Process
Creating an elaborate paper mache snowman requires patience and attention to detail, but the result is a truly unique and impressive decoration. The process involves several steps:
- Balloon Shaping: Inflate a balloon to the desired size of your snowman’s body. Secure the knot.
- Paper Mache Application: Dip strips of newspaper into a paste made of flour and water. Apply the strips evenly over the balloon, overlapping each layer. Allow to dry completely. Repeat this process for several layers to create a sturdy form.
- Balloon Removal: Once completely dry, carefully pop the balloon and remove it from the paper mache shell.
- Shaping and Smoothing: Use scissors to trim any excess paper mache and smooth out any rough edges. You may need to apply additional layers of paste to reinforce weak points.
- Painting and Decoration: Paint the paper mache snowman white. Once dry, add details like eyes, a nose, mouth, buttons, and a hat using paint, felt, yarn, or other materials. Consider adding accessories like a scarf or twig arms.
Comparison of Snowman Styles
Three distinct snowman styles – classic, modern, and whimsical – offer varied aesthetic approaches to snowman decoration.
| Snowman Style | Characteristics | Example |
|---|---|---|
| Classic | Traditional features: round body, carrot nose, coal eyes, twig arms, top hat, scarf. Often uses simple materials. | A snowman made from three snowballs, decorated with simple paint or natural materials. |
| Modern | Clean lines, minimalist design, often incorporates geometric shapes or contemporary color palettes. May use unconventional materials. | A snowman made from stacked geometric shapes, painted in muted tones with minimal detailing. |
| Whimsical | Character-driven, playful, and imaginative. Often incorporates unusual features, bold colors, and unexpected textures. | A snowman wearing a brightly colored outfit, with mismatched accessories and exaggerated features. |
Construction Techniques for DIY Snowmen
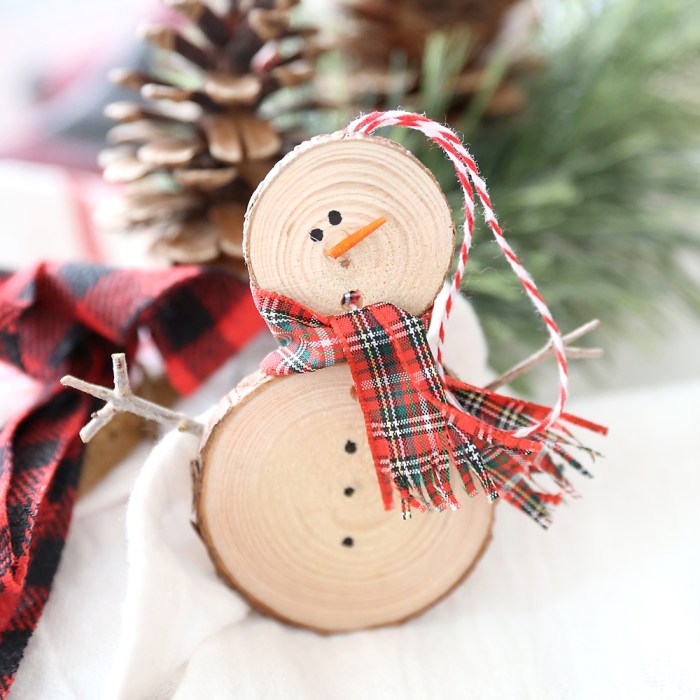
Creating charming snowman decorations involves selecting the right materials and employing suitable construction techniques to ensure durability and aesthetic appeal. The choice of method depends on your desired level of detail and the available materials. Proper layering and securing are crucial for a sturdy and long-lasting ornament.
Felt and Embroidery Snowman Construction
This method allows for intricate detailing and a charming, handcrafted look. We will Artikel a step-by-step guide using felt, embroidery floss, and basic sewing skills.
- Cutting the Felt Pieces: Begin by cutting three circles from white felt, progressively decreasing in size to represent the snowman’s body. These circles should be large enough to create a pleasing snowman proportion. Also, cut smaller circles from orange felt for the nose and black felt for the eyes and buttons. Consider adding a small circle of black felt for a top hat.
- Embroidering Facial Features: Using black embroidery floss, carefully embroider the eyes and mouth onto the largest felt circle. A simple smile or two dots for eyes will suffice. For a more detailed look, consider using French knots for the eyes and a more elaborate stitched smile.
- Attaching the Nose: Sew the orange felt nose onto the largest felt circle. A simple running stitch is sufficient to secure it. Position the nose slightly off-center for a more whimsical look.
- Assembling the Snowman: Layer the felt circles, placing the smallest on top. Use a running stitch to secure each layer to the one beneath it. Ensure the stitches are small and even for a neat finish. Leave a small gap at the back of each layer to allow for stuffing (optional).
- Adding Buttons: Sew on the black felt buttons using a similar technique. Arrange them in a vertical line on the snowman’s body.
- Stuffing (Optional): If desired, lightly stuff the snowman with cotton or polyester fiberfill through the gap left at the back of each layer. This will give it a more three-dimensional appearance. Carefully stitch the gaps closed once stuffed.
- Adding a Hat (Optional): If you cut a small black felt circle, sew this into a cone shape to create a top hat. Sew or glue the hat to the top of the snowman’s head.
Imagine the finished product: A charming snowman with neatly embroidered features, perfectly placed buttons, and perhaps a jaunty little top hat. The felt is soft and the embroidery adds a personal touch.
Paper Plate Snowman
This method is ideal for quick crafting and involves minimal materials. It’s a great option for children’s projects or for creating multiple snowmen quickly.
- Gathering Materials: You will need three paper plates (different sizes for layering), markers, glue, and optional embellishments like glitter, pom-poms, or buttons.
- Drawing Facial Features: Draw the snowman’s face (eyes, nose, mouth) on the largest paper plate using markers. Consider using a carrot-shaped orange nose.
- Layering the Plates: Glue the medium-sized plate on top of the largest, slightly offsetting it for a more three-dimensional look. Then, glue the smallest plate on top of the medium-sized plate.
- Adding Embellishments: Glue on buttons or pom-poms to represent the snowman’s buttons. Add glitter for a sparkly effect.
Fabric Scrap Snowman
This technique uses fabric scraps, offering a unique opportunity to utilize leftover materials and create a textured snowman. The method involves layering and stitching fabric scraps together to form the snowman’s body.
- Collecting Fabric Scraps: Gather various white fabric scraps in different textures and shades. Consider using felt, fleece, or cotton.
- Cutting and Layering: Cut three roughly circular shapes from the fabric scraps, progressively decreasing in size. The shapes don’t need to be perfect circles; irregular shapes add to the charm. Layer the fabric pieces, slightly overlapping for a more textured look.
- Securing the Layers: Use a running stitch or a simple blanket stitch to secure the layers together. Leave a small opening at the back to stuff with fiberfill if desired.
- Adding Details: Use fabric scraps or buttons to create the snowman’s facial features and buttons. You can also use embroidery floss to stitch on details.
Adding Detail and Personalization
Adding personal touches transforms a simple snowman decoration into a unique and cherished keepsake. By incorporating individual style and creativity, your snowman becomes more than just a craft; it becomes a reflection of your personality and festive spirit. The possibilities for customization are virtually endless, allowing for a truly personalized holiday display.
Personalizing your DIY snowman decoration allows you to inject your own unique style and preferences into the design. This can range from subtle details to significant alterations, creating a snowman that truly stands out. Consider the overall aesthetic you are aiming for – rustic, modern, whimsical, or traditional – and let this guide your choices.
Five Ways to Personalize a DIY Snowman Decoration
The following five methods offer diverse avenues for expressing individuality in your snowman design. Each technique provides a unique opportunity to create a truly personalized and memorable decoration.
- Unique Materials: Instead of traditional materials, use repurposed items like buttons, fabric scraps, or even small toys for added character and texture. A snowman made from painted pinecones or stacked wooden slices offers a rustic charm, while one adorned with colorful felt scraps exudes a vibrant, playful energy.
- Personalized Accessories: Add small, meaningful items that reflect the recipient’s hobbies or interests. A tiny miniature book for a reading enthusiast, a miniature guitar for a music lover, or a small sports ball for an athlete instantly personalizes the snowman.
- Customizable Color Schemes: Move beyond the traditional white, orange, and black. Experiment with different shades of white, pastel colors, or even metallic paints to create a unique color palette that matches your personal style or holiday theme.
- Embellishments and Textures: Incorporate various textures and embellishments to add visual interest. Use glitter, sequins, lace, or ribbons to create a festive and eye-catching snowman. A textured scarf knitted from chunky yarn contrasts beautifully with the smooth surface of the snowman’s body.
- Handwritten Messages: Add a personal touch with a handwritten message or a small, personalized tag. This adds a sentimental value, making it a cherished keepsake for years to come. The message could be a holiday greeting, a short poem, or a loving inscription.
Facial Expressions and Poses for Snowman Decorations
The expression and pose of your snowman significantly impact its overall personality and appeal. Consider these options to bring your creation to life.
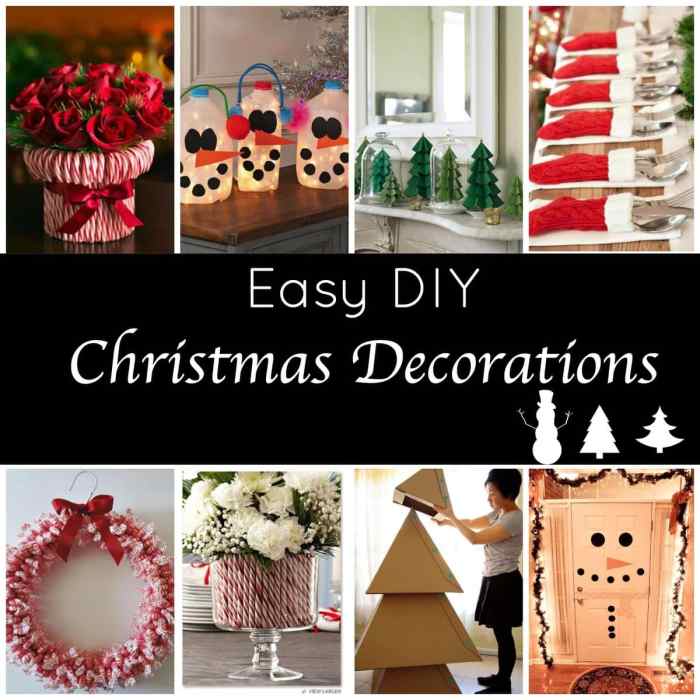
Creating a DIY Christmas decorations snowman is a fun and festive project. For more inspiration beyond snowmen, check out these other fantastic diy christmas decoration ideas to enhance your holiday spirit. From there, you can easily adapt some of those concepts to further personalize your charming snowman decorations, making them truly unique.
- Smiling Snowman: A simple, cheerful smile creates a warm and inviting atmosphere. This classic expression is perfect for a traditional holiday setting.
- Mischievous Snowman: A slightly crooked smile, one eyebrow raised, and a playful wink add a touch of whimsy and humor. This expression is ideal for a more modern or playful aesthetic.
- Sleepy Snowman: Droopy eyes and a relaxed posture create a peaceful and calming vibe. This expression works well for a rustic or cozy setting.
- Shy Snowman: Downcast eyes and a slightly tilted head evoke a sense of shyness and innocence. This is perfect for a delicate or romantic theme.
- Surprised Snowman: Wide eyes and an open mouth convey a sense of wonder and excitement. This works well for a dynamic or energetic setting.
Three Hat and Scarf Designs for Snowman Decorations
The hat and scarf are key elements in defining the snowman’s style. Experimenting with different designs allows for significant personalization.
- Cozy Knitted Set: Imagine a chunky, hand-knitted scarf in a warm cream color, loosely draped around the snowman’s neck. The hat is a matching beanie, slightly askew, adding a touch of casual charm. This evokes a sense of warmth and comfort, ideal for a rustic or traditional theme.
- Elegant Velvet Ensemble: A rich, dark-red velvet hat with a small, elegant feather tucked into the band adds a touch of sophistication. The scarf is a matching velvet ribbon, tied neatly around the neck. This creates a luxurious and elegant look, suitable for a formal or glamorous holiday setting.
- Playful Patchwork Design: A patchwork hat made from colorful fabric scraps, sewn together in a whimsical pattern, creates a vibrant and playful look. The scarf is a long, striped piece of fabric, tied loosely around the neck, allowing some of the fabric to drape down the snowman’s body. This creates a fun and eclectic design, suitable for a child’s room or a more casual holiday setting.
Displaying your DIY Snowman Decorations
Displaying your handcrafted snowman decorations effectively can significantly enhance the festive ambiance of your home, both indoors and outdoors. Careful consideration of placement, lighting, and overall arrangement will transform your charming snowmen from individual pieces into a cohesive and delightful winter wonderland. This section will explore optimal display strategies for maximizing the visual impact of your creations.
Indoor and Outdoor Display Locations for DIY Snowmen, Diy christmas decorations snowman
Strategic placement is key to showcasing your DIY snowman decorations. The following table Artikels various locations, display methods, advantages, and potential drawbacks for both indoor and outdoor settings.
| Location | Display Method | Advantages | Disadvantages |
|---|---|---|---|
| Mantlepiece | Arrange snowmen of varying sizes, perhaps incorporating miniature trees or other winter-themed decorations. | Focal point of a room; creates a welcoming atmosphere. | Limited space; may require careful arrangement to avoid overcrowding. |
| Windowsills | Line up snowmen of similar size or create a tiered display using books or boxes. | Visible from outside; adds charm to the exterior view. | Susceptible to dust and potential damage from sunlight. |
| Dining Table Centerpiece | Group snowmen of varying heights and styles around a candle or other centerpiece item. | Adds a festive touch to gatherings; sparks conversation. | May need to be rearranged for mealtimes. |
| Front Porch | Position snowmen on steps, near the door, or along a walkway. | Welcomes guests; visible from the street. | Exposure to weather elements; may require protection from rain or snow. |
| Garden Beds | Place larger snowmen amongst winter plants or evergreen shrubs. | Adds a whimsical touch to the landscape; blends with natural surroundings. | Requires weather-resistant materials; may need to be stored during inclement weather. |
The Impact of Lighting on Snowman Decorations
Lighting plays a crucial role in enhancing the visual appeal of your snowman decorations. Strategic lighting can highlight textures, details, and the overall charm of your creations. Warm, soft lighting, such as from string lights or candles, creates a cozy and inviting atmosphere, particularly effective for indoor displays. For outdoor displays, consider using weatherproof LED lights to illuminate your snowmen, ensuring they remain visible even at night.
Avoid harsh, direct lighting that might wash out the colors or details of your snowmen. Subtle backlighting can create a magical glow, adding depth and dimension to your display.
A Visually Appealing Snowman Display Scene
Imagine a charming corner in your living room. A small, rustic wooden shelf holds three distinct snowmen. The largest snowman, crafted from a repurposed ceramic pot, sits proudly in the center. He wears a jaunty red scarf and a top hat fashioned from a repurposed acorn cap. To his left, a smaller snowman, made from painted pinecones, sports a miniature knitted hat and tiny twig arms.
To his right, a whimsical snowman crafted from white socks filled with cotton wool perches on a small stack of books. This snowman wears a whimsical button nose and googly eyes. A strand of warm-white LED fairy lights is draped subtly behind the shelf, casting a gentle glow on the snowmen, highlighting their textures and creating a magical winter scene.
The overall effect is one of playful charm and festive cheer, emphasizing the unique personality of each snowman while maintaining a cohesive and visually appealing display.
Clarifying Questions: Diy Christmas Decorations Snowman
Can I use outdoor materials for indoor snowman decorations?
Yes, but ensure they are clean and dry to prevent mold or mildew.
How long do these snowman decorations typically last?
Durability varies depending on materials; well-made decorations can last for several years with proper storage.
What if I don’t have all the materials listed?
Feel free to substitute with similar items; the guide emphasizes creativity and resourcefulness.
Are these decorations suitable for children to help make?
Yes, many of the simpler designs are age-appropriate with adult supervision.






0